Table of Contents
Using iPXE in VMware
You can replace the default VMware PXE ROM with an iPXE ROM, which will enable you to boot your virtual machine via HTTP, iSCSI, AoE, or any other protocol supported by iPXE.
Selecting the network adapter
VMware is capable of emulating several network adapters:
| VMware name | iPXE driver name | PCI vendor:device IDs | iPXE ROM image |
|---|---|---|---|
| e1000 | intel | 8086:100f | 8086100f.mrom |
| e1000e | intel | 8086:10d3 | 808610d3.mrom |
| vlance | pcnet32 | 1022:2000 | 10222000.rom |
| vmxnet | (not supported) | 15ad:0720 | |
| vmxnet3 | vmxnet3 | 15ad:07b0 | 15ad07b0.rom |
Select one of the supported network adapters, and ensure that your virtual machine is configured to use this adapter. You can do this by editing the .vmx file that defines your virtual machine, and changing the setting
ethernet0.virtualDev
For example, to select an e1000 network adapter:
ethernet0.virtualDev = "e1000"
Building the ROM images
Download iPXE and then build ROM images for all of the supported network adapters using:
make bin/8086100f.mrom bin/808610d3.mrom bin/10222000.rom bin/15ad07b0.rom
Copy the iPXE ROM images 8086100f.mrom, 808610d3.mrom, 10222000.rom and 15ad07b0.rom to a suitable location (e.g. to the directory /usr/lib/vmware/resources/).
Configuring the virtual machine
Edit the .vmx file that defines your virtual machine, and add the following lines:
  ethernet0.opromsize = 262144
  e1000bios.filename = "/usr/lib/vmware/resources/8086100f.mrom"
  e1000ebios.filename = "/usr/lib/vmware/resources/808610d3.mrom"
  nbios.filename = "/usr/lib/vmware/resources/10222000.rom"
  # nxbios.filename = ""
  nx3bios.filename = "/usr/lib/vmware/resources/15ad07b0.rom"
(replacing /usr/lib/vmware/resources/ with the name of the directory to which you copied the iPXE ROM images).
Booting the virtual machine
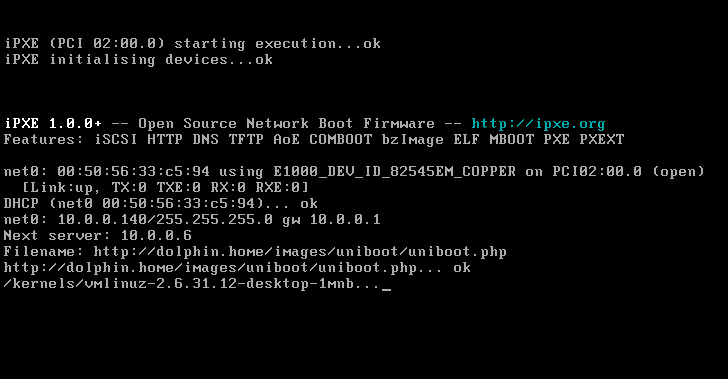
Boot your virtual machine in the usual way. You should see VMware detect and use the iPXE ROM:
Congratulations on successfully using an iPXE ROM in your VMware virtual machine!
Advanced features
The VMware logfile console
VMware creates a log file for each virtual machine, which is usually the file vmware.log in the same directory as the virtual machine's .vmx file. You can record the output from iPXE in this log. For example:
  2012-02-28T23:23:58.016Z| vmx| I120: Ethernet0 MAC Address: 00:0c:29:3a:7d:f2
  2012-02-28T23:23:59.145Z| vmx| I120: VMX_PowerOn: ModuleTable_PowerOn = 1
  2012-02-28T23:23:59.356Z| vcpu-0| I120: Intel VT enabled.
  2012-02-28T23:23:59.359Z| vcpu-0| I120: VMM initialized.
  2012-02-28T23:23:59.362Z| vcpu-0| I120: Monitor has started
  2012-02-28T23:24:02.775Z| vcpu-0| I120: Guest:
  2012-02-28T23:24:02.778Z| vcpu-0| I120: Guest: iPXE 1.0.0+ --  http://ipxe.org
  2012-02-28T23:24:02.781Z| vcpu-0| I120: Guest: Features: iSCSI HTTP DNS bzImage PXE PXEXT
You can record output from iPXE in the VMware log file by enabling the build option CONSOLE_VMWARE.
VMware GuestInfo settings
You can configure iPXE settings directly in the virtual machine's .vmx file using VMware's GuestInfo feature. For example, to configure a static IP address, default gateway, DNS server, and boot filename:
  guestinfo.ipxe.net0.ip = "192.168.0.15"
  guestinfo.ipxe.net0.netmask = "255.255.255.0"
  guestinfo.ipxe.net0.gateway = "192.168.0.1"
  guestinfo.ipxe.dns = "192.168.0.1"
  guestinfo.ipxe.filename = "http://boot.ipxe.org/demo/boot.php"
This could be used in conjunction with an embedded script to boot without using DHCP. For example:
  #!ipxe

  ifopen net0
  chain ${filename}
You can enable the VMware GuestInfo settings using the build option VMWARE_SETTINGS.


