Table of Contents
Capturing a packet trace
When diagnosing problems, it can be useful to capture a packet trace. This allows other users to see exactly what is happening on your network, and can greatly reduce the time taken to fix a problem.
How to capture
The easiest way to capture a packet trace is to use Wireshark. This is included with most Linux distributions (just use your normal software installation mechanism to download and install a package named wireshark), and can be downloaded for Windows and Mac OS X.
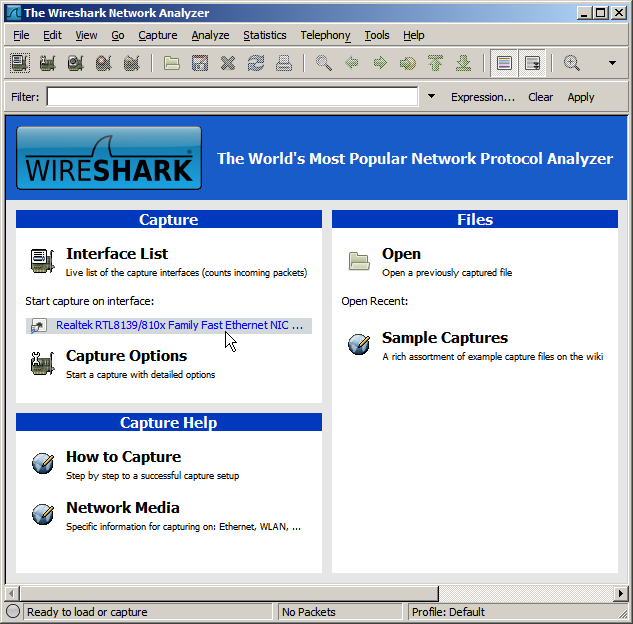
Start up Wireshark and start capturing on the appropriate network interface:
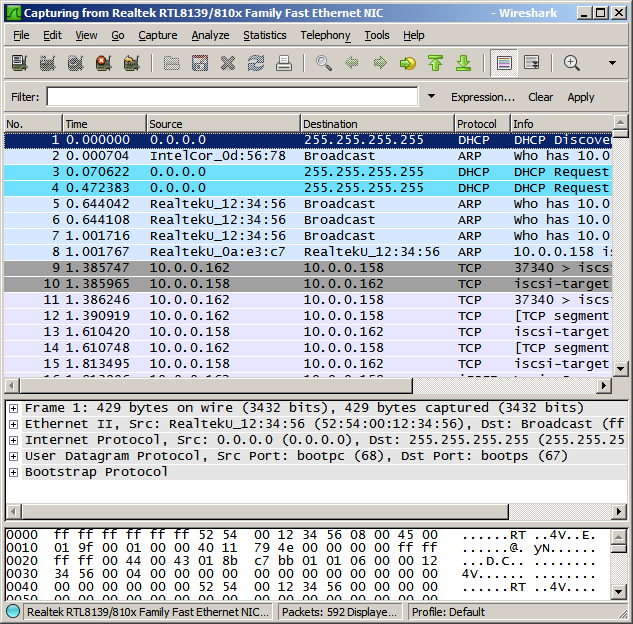
While Wireshark is capturing, reproduce your problem. For example, if your problem is that iPXE is unable to boot from your iSCSI target, you should start up Wireshark and then try to boot from your iSCSI target. You should see a list of captured packets show up in the Wireshark window:
Choose Capture → Stop to stop capturing, and File → Save As to save your capture file.
Where to capture
You should set up a machine to intercept all network traffic to and from iPXE:
The interceptor machine must be configured with two network interfaces. One interface should be connected only to the iPXE machine. The other interface should be connected to your network. The two network interfaces must be bridged (see below) to enable iPXE to communicate via the interceptor machine.
Interceptor machine running Linux
Under Linux, you can bridge the two network interfaces using the brctl command-line utility. (You may need to install a package such as bridge-utils in order to use this command.)
Shut down the two interfaces that you wish to bridge together. For this example, we shall bridge interfaces eth0 and eth1:
  ifdown eth0
  ifdown eth1
Create a new bridge interface. For this example, we shall create the bridge interface br0:
  brctl addbr br0
  brctl setfd br0 0
Add the two interfaces to your bridge:
  ifconfig eth0 up
  brctl addif br0 eth0
  ifconfig eth1 up
  brctl addif br0 eth1
You can check your bridge configuration using brctl show. You should see something like:
  bridge name   bridge id           STP enabled   interfaces
  br0           8000.00270e0d5678   no            eth0
                                                  eth1
You can now intercept all network traffic to and from iPXE by running Wireshark on the interceptor machine and capturing on the interface br0.
Interceptor machine running Windows
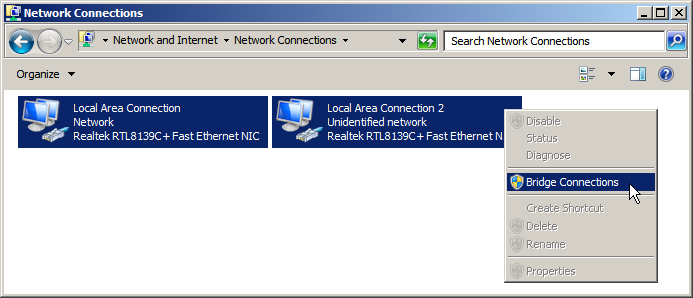
Under Windows, you can bridge the two network interfaces using the Network Connections control panel. Select the two interfaces, right-click, and choose Bridge Connections:
You can now intercept all network traffic to and from iPXE by running Wireshark on the interceptor machine and capturing on the interface called Microsoft MAC Bridge Virtual NIC.
Intercepting a virtualised iPXE
If you are running iPXE inside a virtual machine, then you can intercept all network traffic to and from iPXE by running Wireshark on the host machine, without needing to set up a separate interceptor machine.
Intercepting using port mirroring
If you have a switch that supports port mirroring, then you can intercept all network traffic to and from iPXE by running Wireshark on an interface attached to a port that mirrors the port attached to the iPXE machine, without needing to set up a separate interceptor machine.
Capturing without intercepton
If you are unable to intercept network traffic, then you should run Wireshark on the machine that handles the functionality that you are trying to troubleshoot. For example, if the problem is that iPXE is failing to acquire an address from your DHCP server, then you should install and run Wireshark on your DHCP server. If the problem is that iPXE is successfully acquiring an address from DHCP but is then failing to boot from your iSCSI target, then you should install and run Wireshark on your iSCSI target. It may not always be practical to install Wireshark on the relevant machine, and this method may not capture all the required packets.
Using your capture file
You can send your capture file to anyone who is helping to diagnose your problem.
Please be aware that packet capture files can be quite large. You should therefore generally avoid e-mailing your file to a whole mailing list. You could make your capture file available on your own web site and e-mail the relevant URL to the mailing list, or you could e-mail the capture file only to people who individually ask to receive it.
Please also be aware that a packet capture may contain sensitive information such as details of your network infrastructure, or (in rare cases) clearly visible passwords.


